The 7 steps to your balcony power plant
Implementing a balcony power plant goes beyond merely setting up the panels. Discover our comprehensive, easy-to-follow guide that outlines all the essential steps you need to take before commissioning your system, ensuring a smooth and successful setup.
Step 1.
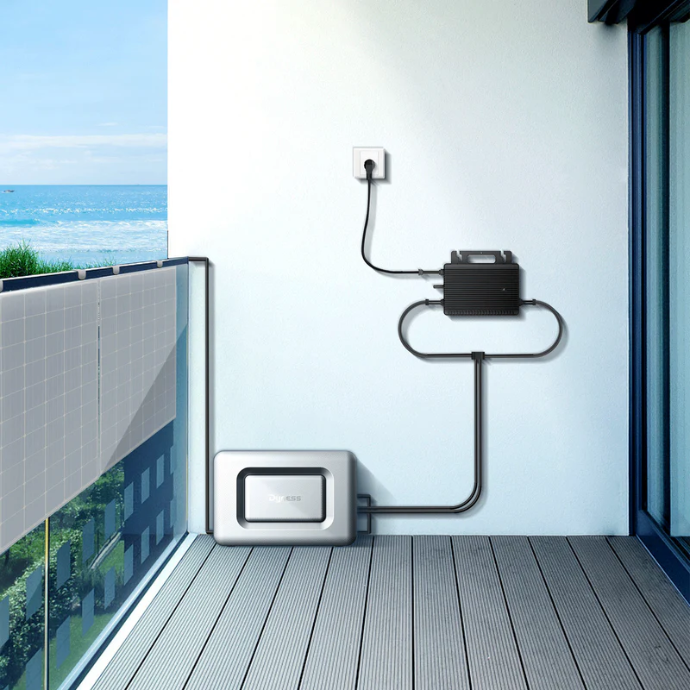
Choose the perfect location for your balcony power plant! Check if your preferred spot is suitable. Ensure there is an outlet nearby and select a sunny location. This way, you maximize the efficiency of your solar system!


Step 2.
Transform your balcony, terrace, roof, or garden with a balcony power plant! Get permission from your landlord or property management and get ready for a sustainable energy future.
Step 3.
Electrical installation: Selection of the plug-in device. Schuko plug or Wieland plug. What are the differences?
Step 4.
Choose a balcony power plant that perfectly fits your needs and covers your individual energy consumption. Make sure it comes with the right plug, and optionally, select a measuring device to accurately track the generated power. With our selection, you're well-equipped for a sustainable energy supply!

Step 5.
Don't forget to register your mini solar system with the local grid operator, ensuring your energy independence.
Step 6.
Mount the mini solar system independently following the instructions in the user manual. Ensure that the commissioning takes place only after registering the system with the grid operator and installing a meter with reverse lock or a bidirectional meter.


Step 7.
Unlock the full potential of your mini solar system by registering it with the Federal Network Agency's Market Master Data Register. Ensure your energy independence and join the renewable energy revolution today!